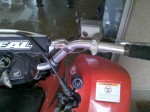
The Motion Pro twist throttle kit arrived from Rocky Mountain ATV.
I am documenting the installation procedure in case I need to do it again in the future, or if anyone else is trying this for the first time and needs some help. These are the steps I took to convert the stock thumb throttle to a Motion Pro twist throttle.
Part: Motion Pro – Twist throttle kit
Machine: 2005 Honda Fourtrax TRX 400 EX
Tools used:
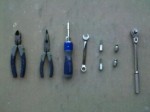 Wire cutters, Needle nose pliers
Phillips screw driver
14mm Wrench
5mm Allen key
8mm Socket
10mm Socket
400 Grit Sandpaper
Step 1 – Removing the Stock Thumb Throttle Assembly
- Remove all zip ties from the handle bars.
- You don’t have to remove the cable ties if you just want to lay the handlebars over the front fenders but it makes it easier to work with if you remove them all.
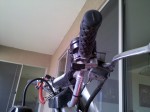
- Using the screw driver, remove the two screws from the bottom of the thumb throttle.
- Remove the throttle assembly from the bars and put the cap and screws back together loosely.
Step 2 – Removing the Brake Lever
- Using an 8mm wrench or socket, remove the two bolts for the brake lever assembly.
- Thread the bolts back in through the cap to keep it all together.
Step 3 – Removing the Switch Assembly
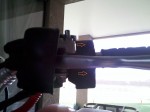 Remove the 2 screws from the back side of the switch assembly.
- Be careful not to bend the assembly. Slide it apart gently in the same direction the screws came out.
- There is a plastic tab at the bottom that will break if you try to twist it apart.
Step 4 – Removing the Clutch Lever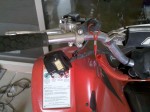
- Remove the 2 bolts for the clutch lever assembly, using an 8mm wrench or socket.
Step 5 – Removing the handle bar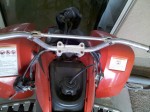
- Remove the 4 bolts on your handle bar clamps. I have an aftermarket clamp because I switched to the Burgard 450 steering stem a while back.
Step 6 – Removing the Grips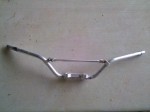
- Even though mine were loose and coming off when I rode, I still had to cut them 3/4 of the way to get them to slide off. I had my last set put on at a shop that used spray paint. I wouldn’t recommend that method.
- Clean off the handlebars where the grips were. The twist throttle needs a clean surface to mount over and the left grip will be too difficult to slide over a dirty or sticky bar.
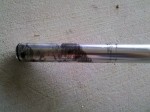
- I used a 400 grit sandpaper. If you have painted or polished bars, make sure not to go too far in or you will scratch/dull the paint where you will see it later.
Step 7 – Removing the plastics
- Remove the seat.
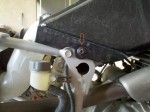
- They are the same on both sides, so just repeat these next steps for the other side.
- Remove the allen bolt with an 5mm Allen tool.
- Using a 10mm wrench or socket, remove the 2 bolts from under the front fender.
- At some point you may have to remove the tank
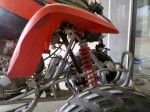 cover. Mine is already gone because the Burgard stem hits it at full turn and binds the steering. Sorry, but I took it off so long ago, I don’t remember the method.
 - Remove the hood from between the front fenders. You pull up on the highest part, near handle bars. Once the upper fasteners are clear, slide it towards
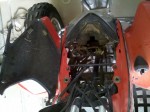 the bars. The lower part of the hood uses and L shaped anchor.
 - The plastics should now be loose. I just pulled mine forward until I had enough room to get to the straps on each side of the gas tank.
Step 8 – Removing the fuel tank
- Remove the 2 bolts from the top of the tank, just behind the steering stem with a 10mm wrench or socket.
- Remove the straps on each side of the tank by lifting them up over the lip on the tank.
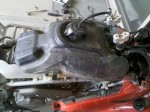
- Make sure the valve is OFF, then remove the fuel line from the side of the fuel valve. I used a pair of angled needle nose pliers. Be careful not to bend the clamp, it doesn’t take much force to slide it off. I couldn’t get a clear picture of the clamp, it’s kind of hard to get to.
- If you cant reach in to the clamp, try lifting the tank up on to the handle bar stem as much as the line will allow. This slides the tank forward and creates more room around the line.
Step 8 – Removing the stock throttle cable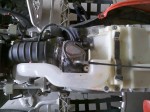
- First you will have to get the air intake tube out of the way.
- Remove the plastic grommet at the front of the tube then lift and wiggle the tube forward until you have enough clearance.
- If the tube is too tight to slide forward, loosen the hose clamp attaching it to the air box.
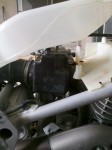
- There are 2 screws at the top of the cover. Remove those and swing the top away from the carb, then lift it off.
- Grab the throttle wire(A) with your fingers and pull it down to create slack and slide the end of the wire out of the lever(B).
- If you can’t get enough slack with the cable, try twisting the throttle lever upwards (clockwise).
- Once the cable is disconnected, use a 14mm wrench to loosen the lock nut(C) from the cable mount at the top of the carb.
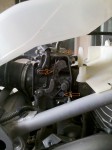
- Now unscrew the metal end of the throttle cable at the top of the carb. There should be enough slack in the rest of the cable to allow it to turn as needed.
- Once the threads are clear from the carb, feed the cable back up towards the handle bars and remove the entire assembly from the quad.
Step 9 – Installing the Motion Pro Twist Throttle Kit
- Feed the carb end of the new throttle cable through the old route that the stock cable took.
- Align the threads to the carb and gently screw the cable guide in to the top of the carb. Once the threads start showing a few rows inside of the carb, you can adjust
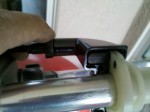 the angle at the top and tighten the lock screw.
 - Attach the end of the throttle cable through the guide, to the roller the same way the original cable was attached.
- Leave the side of the carb open for now. You may have to remove the cable again, or adjust it.
- On the handle bar end, thread the throttle cable in to the twist assembly. The cable will go in and make a 90
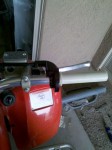 degree turn through the cable guide. It might take a few tries to get the path correct. You have to slide the plastic grip area over the end of the handle bar and line it up with the metal guide then get the end of the cable to secure in the plastic slot.
 - tighten the throttle assembly to the handle bars.
- Twist the throttle and make sure it gives the carb the full motion that is needed and that it returns to idle with no binding.
- If the throttle movement isn’t smooth, check that the handle bar part is assembled correctly, then follow the cable back to the carburetor and make sure there are no kinks or tight bends. Finally, check the cable inside the carb and make sure nothing is binding in there.
- Now you can install the plastic cover on the carburetor and put the air intake tube back in place.
Step 10 – Installing new grips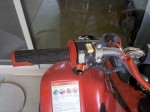
- Check to see if your grips are lableled for right and left.
- I used Spider Grips M1 MX Grips from Rocky Mountain ATV and they were labeled for each side and also had an alignement arrow for the top.
- follow the labels or it wont fit your hands correctly.
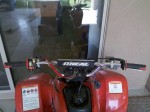
- There are different methods for installing grips and I have had varying success with each. This time I tried the more professional way.
- I used a heat gun at low setting to warm the grips. They expand when warm, so they should be easier to slide on to the handlebars. Don’t get them so hot that they get gummy or start to melt. You still need to apply some pressure to get them on and you don’t want them bunching up.
- Apply grip glue following the directions for your grips. I used a little bit more than the directions called for and it ended up dripping out of the grip and on to the plastic fender.
- I used Pro Taper Grip Glue. You have to move quick with this stuff, it dries like super glue.
- Slide the grip over the handle bar and work it all the way on. Mine went on easy until about half way, then they became difficult to push any further. I had to twist and push at the same time, but keep in mind the top alignment.
- Check for excess glue and wipe it off if necessary. Don’t use your fingers unless you like them covered with a hard shell of glue that doesn’t wash off.
- Twist the throttle and make sure it still moves.
